I shopped hours online looking for the perfect gift. Clothes, watches, wallets, and, accessories were all out because he doesn't need any more of those. So I looked for electronics - massage chairs are too expensive and gadgets at Brookstones also were pricey. I was on many personalization sites but didn't find anything that I was looking for. So I thought long and hard for something that I can buy and then make to call it my own. Something that shows thought and meaning. I mean the guy did fold me 1317 paper stars with his chubby hands. So this time, I must come up with something that will not surpass but at least be up to standard. After thinking some more, I stumbled across Disney's Vinylmation figures on the Disney Store website (looking for Rex and Toy Story). I thought, hm, I can get one and decorate it. Then I researched some more on painting and design. Went to the store and physically bought the 9" Mickey Vinylmation Figure.
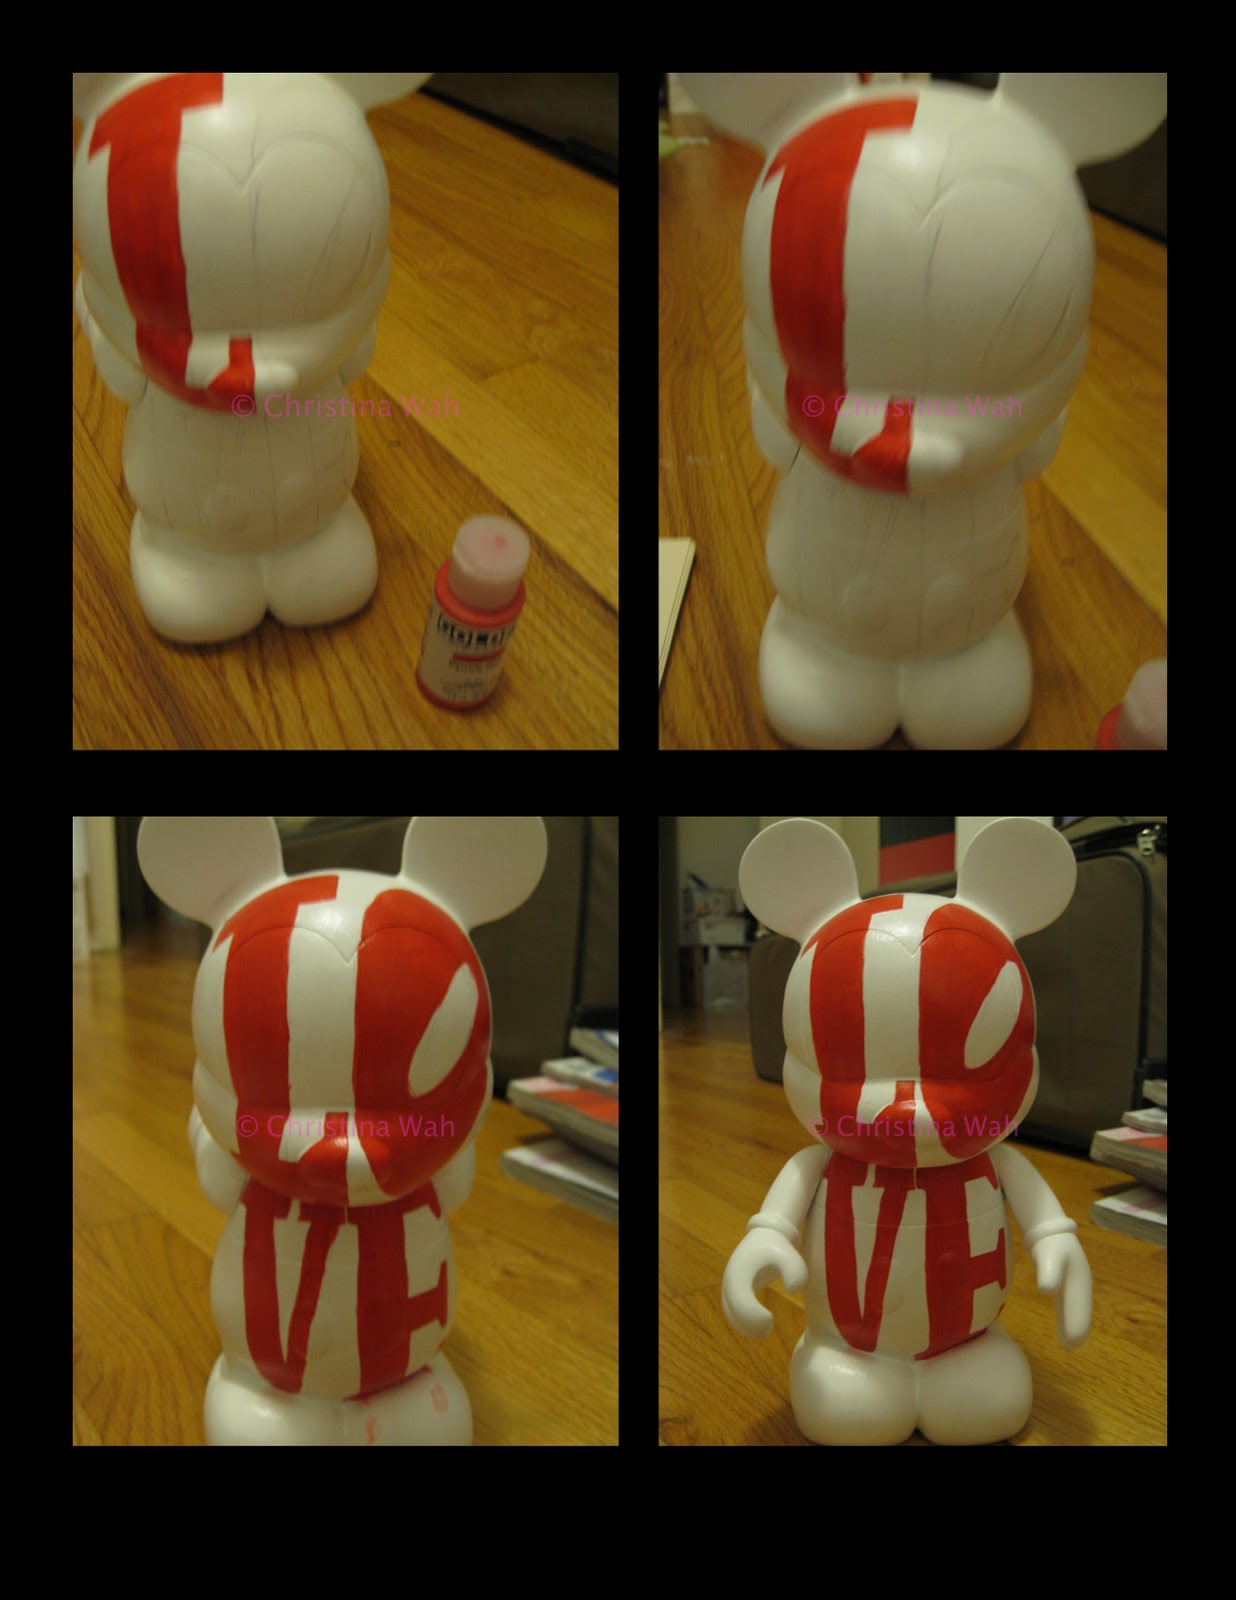
Very proud of myself for coming up with the perfect gift! Really, I think it's rather clever of me this time. Ha Ha. Anyways, I needed paint and brushes so I went to Blick Art supply store. Picked up a primer spray, red and white Golden acrylic paint (1oz each), a red sharpie, and a Bright 2 paint brush. Obviously I had already thought about my colors before purchasing paint. I had actually sketched a few designs for a couple of days and played with my Faber Castle coloring pencils (which I've had for 10 years now)! In the end, I decided to keep things simple (for both the figure and me) and used the famous LOVE sculpture design. I'm sure everyone has seen the stacked LOVE either in a city or a photo. Just a little history lesson: In 1967, pop artist Robert Indiana produced the LOVE sculpture, which can be seen in many cities around the world.
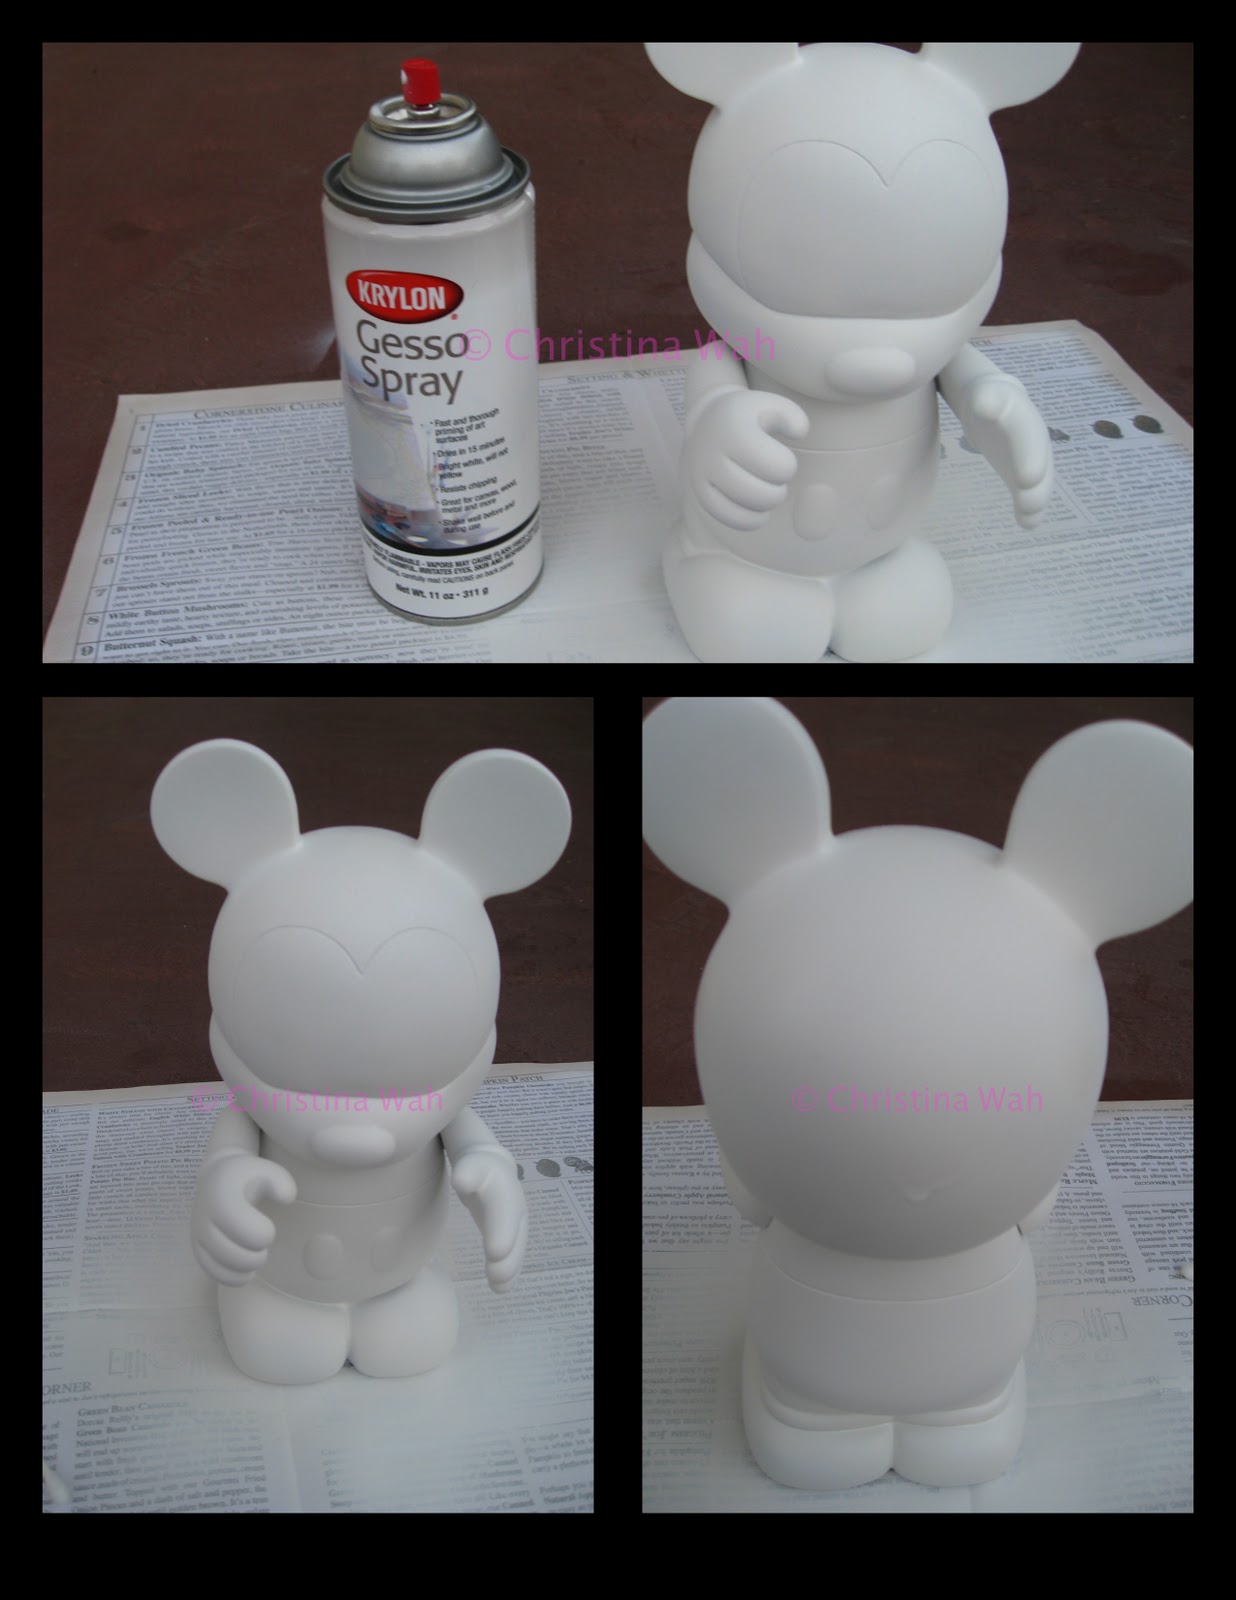
So I planned for at least four days to complete this project. I started on Saturday by spraying the figure with the primer. Well, I am no artist let alone amateur to painting and arty stuff...
Tips for anyone who is new also and wants to try. Pick a well ventilated but non-windy place, preferably the outdoors. Layer the ground with newspaper or magazine pages, just make sure to cover a large area. Read the can for instructions carefully - shaking, swirling, distance, etc. I'm sure most primers have similar instructions so do not neglect the part where it says to spray THIN coats to avoid drip marks. This is the part where I screwed up a little. Well, also the part on covering the area with ample paper (I have left white primer marks on our front porch). Back to spraying, yes, spray about 10 inches away and thinly, so wait a few minutes to spray the next layer. It's tough because of different angles and shapes but do your best. I would say about three layers is sufficient.
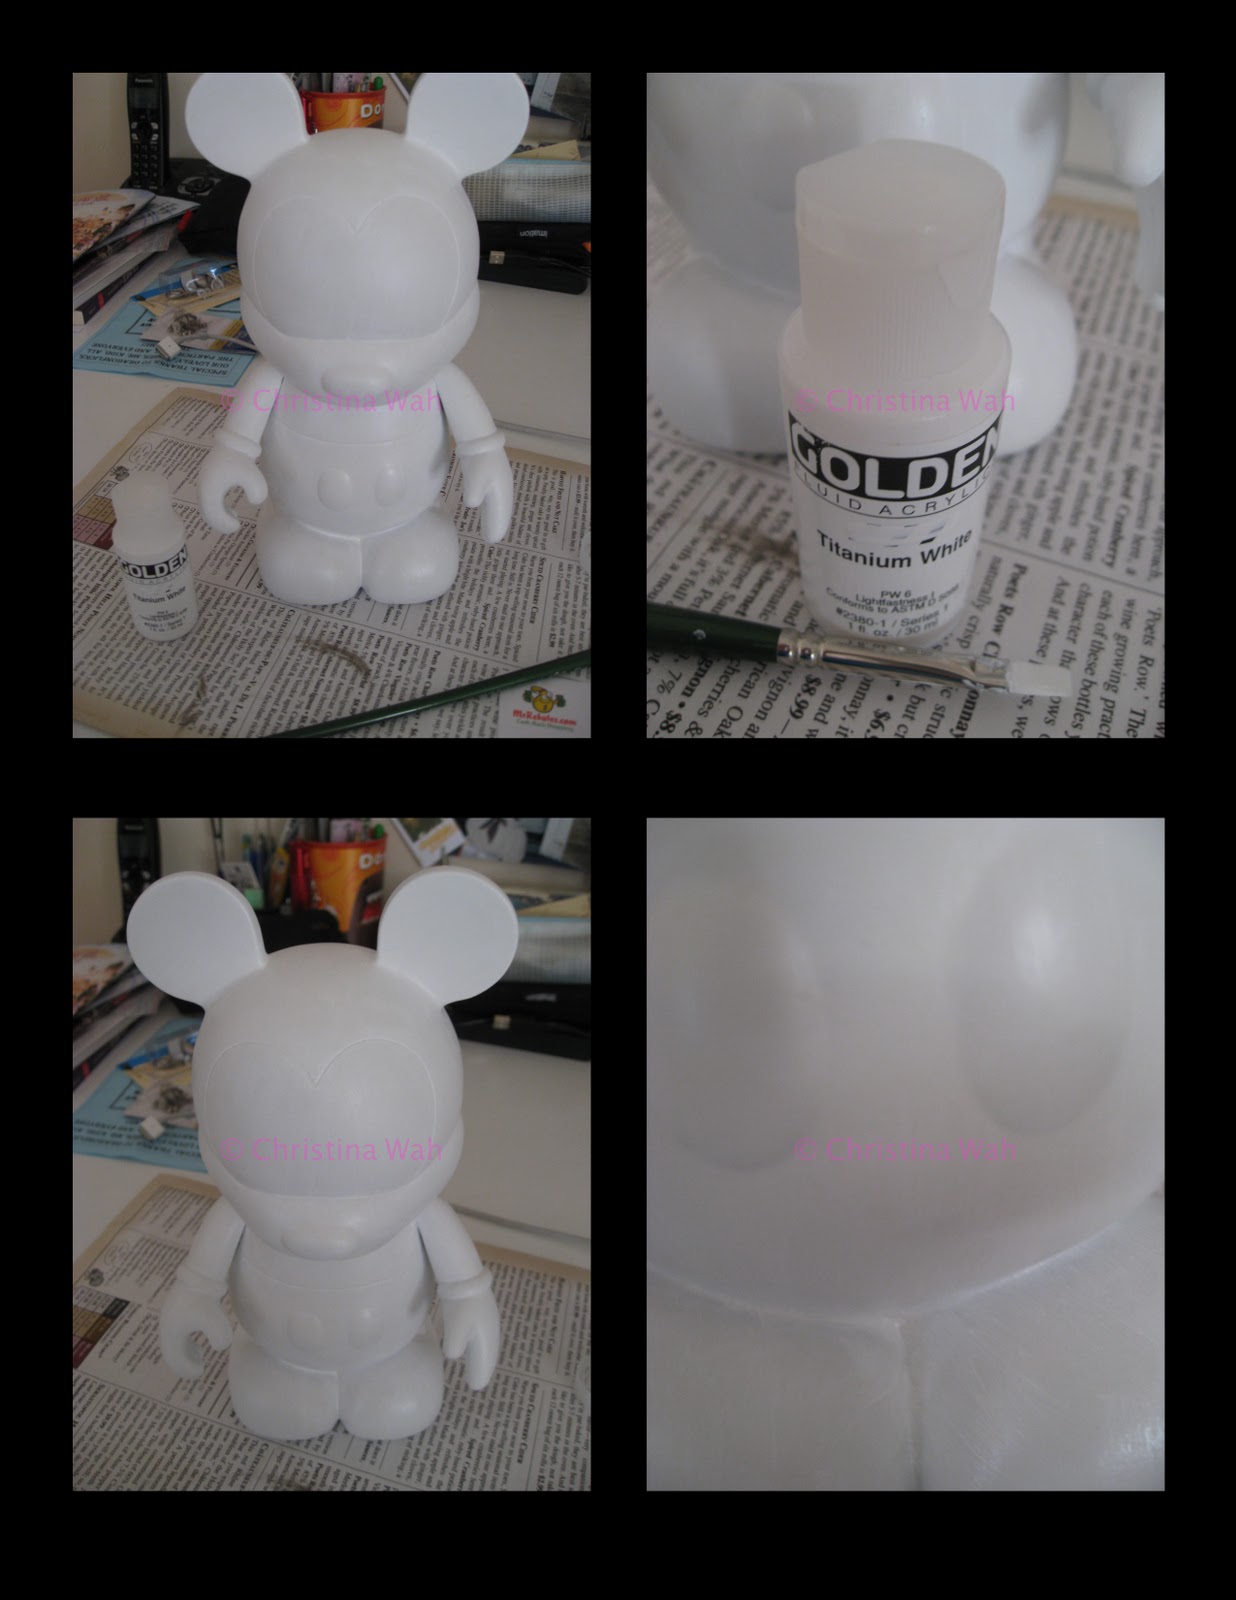
I left it to dry until Monday to paint my very first coat of white paint. Since I decided to use the LOVE design, I kept the majority white and the words red. I really needed a big brush to do the white base but I only bought one which was alright. I must've painted at least two to three coats of white paint over two days. The drip marks (two) were not camouflageded well by the white paint :(
On Wednesday night, I decided the white was good enough and set off to start on the red. Drawing on 3D is very different to 2D. Obviously... I thought I could use a pencil to sketch on the figure and it would erase (as I have read somewhere online...) Apparently that is not so true. It smudges as I tried to erase my horrible sketching. It was difficult to draw straight lines with a ruler too... That's not the last of my problems... I started to paint and realized my hands were very unsteady and it was hard to paint straight even though I bought the bright brush... I should've pushed aside my laziness and used tape to outline my drawing? Maybe that would've worked better. Also, I must say my lack of patience really shows during painting! I accidentally made a red blob on Mickey's foot, oops. At first, I thought it was going to turn out horrible and ugly but it ended up looking pretty good, especially from a far. I mean I'm not happy with the V because it looks too rounded, but overall the effect was good.
Little tip for new and impatient painters like me: don't fret if you paint out of boarder or drop your paint brush, wipe off quickly with paper towel, try to keep the area minimal but get as much paint off as possible. After you are done with all the painting, go back with the background color, in my case was white, and paint a couple of layers over the blotches or even outline the design to clean up the look. In my case, I was pretty lucky it kept it simple with white as the background, I used white paint like white out and painted away pencil markings, smudges, and blotches.
On the back of the figure, I used the red sharpie to write "Happy 3 Year Anniversary" which doesn't look so good thanks to my hand writing... I also drew two hearts on Mickey's bottom~ I decided to keep the whole thing simple to avoid any more hazardous mistakes that could turn the figure into a terrible state.
So voila, that's it, my first personalized vinylmation figure! I enjoyed the whole process as most of the time tested my limiting patience. I definitely commend my efforts not meaning to boast, but I think I did pretty well for a first timer! Enough said, here are pictures of my production:
 |
| Prepping with Primer Spray (Note: you can see the drip marks...) |
 |
| Painting first color - titanium white (Attempt to cover drip mark - fail) |
 |
| Painting design with Pyrole Red (Blotches on Mickey's left foot) |
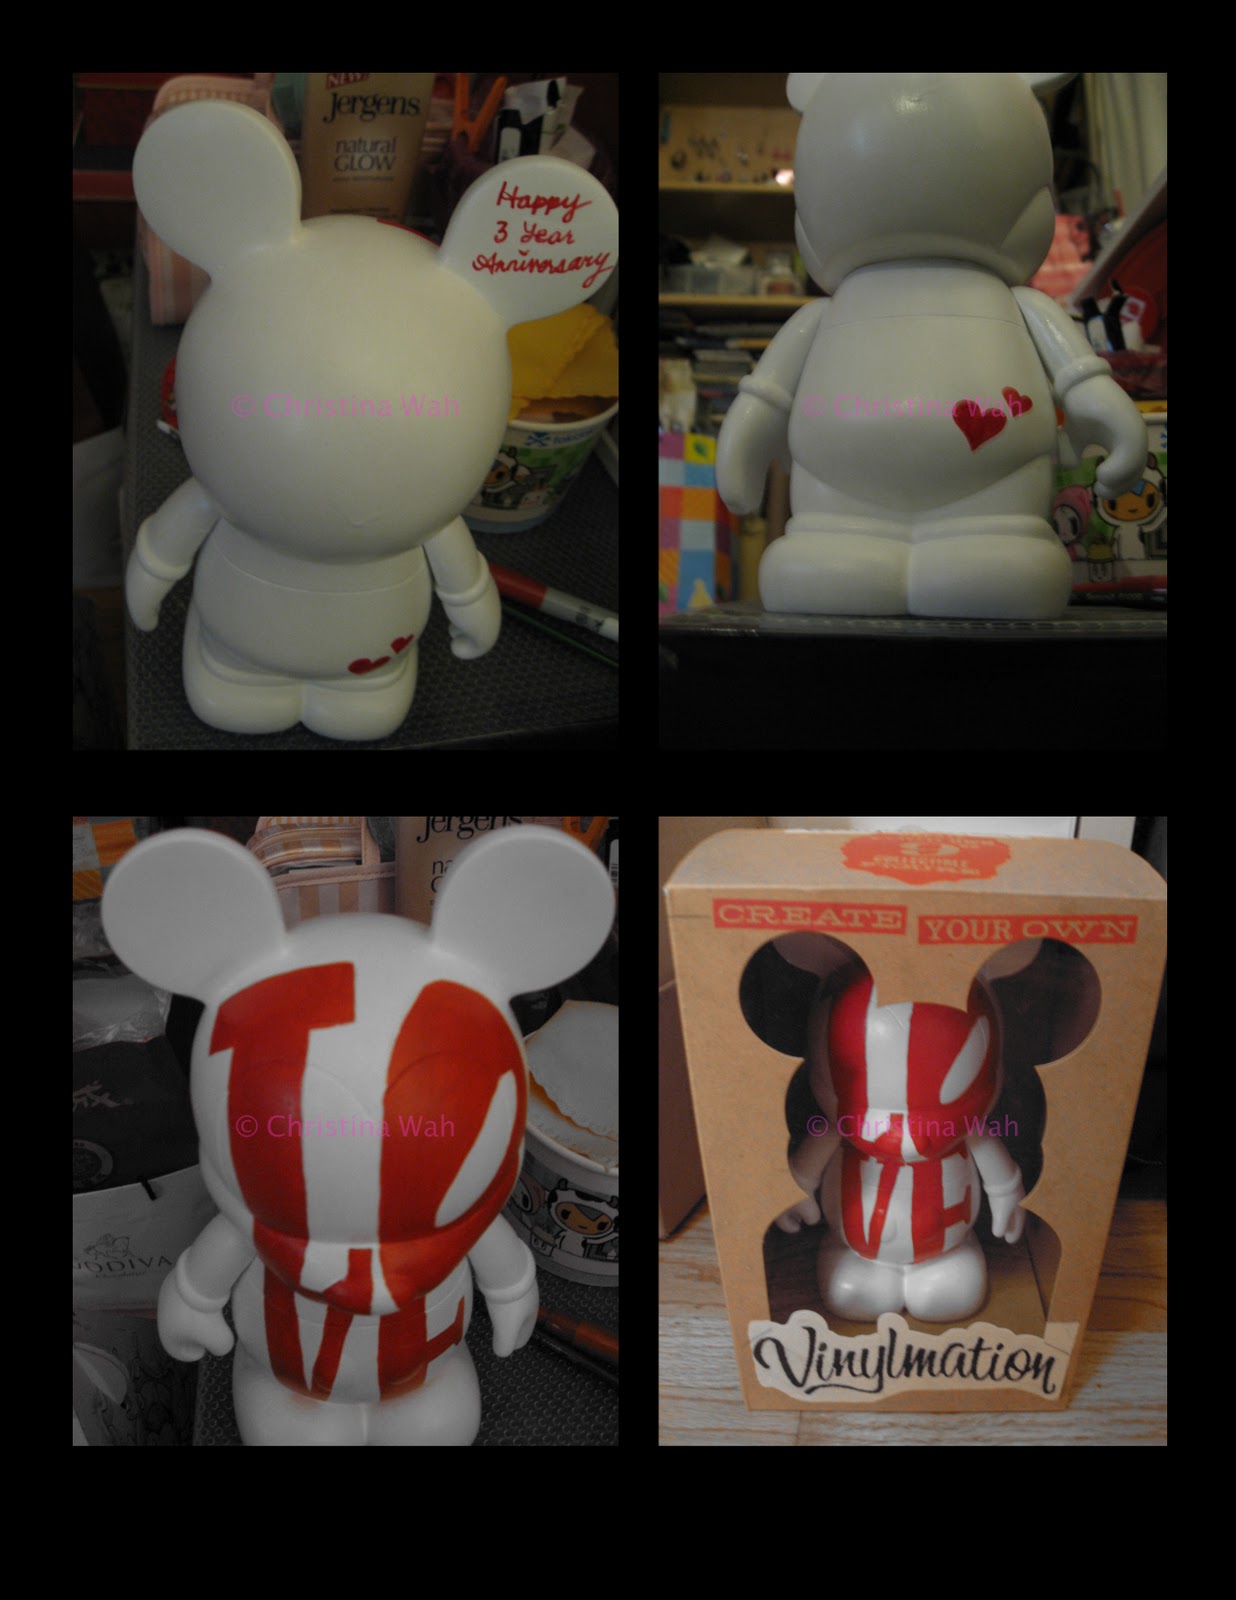 |
| Completed Product! (Cleaned up and final touches added on the back - back in the box) |
***Where is the P.S/Post edit button?***
Update: Recipient actually thought the whole thing was store bought with the design and I just added the writing and hearts on the back. I guess that is a good thing? Must mean the painting wasn't too bad right? Maybe it was just the poor lighting... Haha! Still a success... I think :D
No comments:
Post a Comment